

Showing posts with label character modeling. Show all posts
Showing posts with label character modeling. Show all posts
Tuesday, December 4, 2012
Luigi's Body WIP

Thursday, November 29, 2012
Luigi's Head


Tuesday, August 21, 2012
Mass Update

I thought I would drop by and update the blog really quick...so hello everyone! I'm just about wrapping on the big website/resume/blog/linkedin updating push. It's been a real journey for me during the last week. I actually can't believe how fast all the different pieces came together.
They say (whoever "They" is) that you should update your demo reel every 6 months. While this sounds like a no brainer, in reality it's difficult to keep up with. Life always finds a way of intervening with your art. Also when you work an insane amount of hours the last thing you want to do is come home and work on your demo reel.
But moving forward I definitely want to make more of an effort to do this. The last time I made a demo reel was 2007 and for years my old reel sat around while my art progressed, mostly off the grid. This new reel displays my talents much better. It's format is almost much more friendlier to updates. The template allows me to just swap in new characters in place of older ones. Atleast until I do a major change to the format.
I'm also thinking that I would like to either do an environmental art reel or a generalist reel. I have enough stuff that I think it would be kind of fun to put it on display. Environments are really fun to render because you can move through them (the down side to rendering characters).
I also made a plan for new pieces that don't include any of the new Mad Mario stuff. These are brand new and will be made to display very particular skills. So look for news on that in the future. For now, check out a shorter cut of the demo reel: http://www.dennisflath.com/projects/4452321#1
Wednesday, August 8, 2012
Website!
And now, I'd like to present......
http://www.dennisflath.com

I finally have a dedicate website up to host my work beyond blogger. It feels great to get all my work collected and visible for potential clients to see. I'm honestly having a great time looking through my portfolio and selecting the best work to display. When I was in college, it was a real struggle to get enough work up there to showcase my skills. It really is nice to be able to sort though a large portfolio and only select the best of the best.
On a completely personal level, it's a thrill to look at all I've done and feel proud for each piece of artwork (despite the flaws that are so hard for me NOT to see). I'm truly able to see the work for what it is. I'm also able to see where I need to improve.
When I feel more comfortable with the website, I'll move on to a new short character project before returning to Mario. I'm looking forward to both!
So check out the site. I hope you enjoy!
http://www.dennisflath.com

I finally have a dedicate website up to host my work beyond blogger. It feels great to get all my work collected and visible for potential clients to see. I'm honestly having a great time looking through my portfolio and selecting the best work to display. When I was in college, it was a real struggle to get enough work up there to showcase my skills. It really is nice to be able to sort though a large portfolio and only select the best of the best.
On a completely personal level, it's a thrill to look at all I've done and feel proud for each piece of artwork (despite the flaws that are so hard for me NOT to see). I'm truly able to see the work for what it is. I'm also able to see where I need to improve.
When I feel more comfortable with the website, I'll move on to a new short character project before returning to Mario. I'm looking forward to both!
So check out the site. I hope you enjoy!
Monday, July 9, 2012
Luigi
I've been doing some texture painting and sculpting at the office so I'm taking a little break from the Wacom tablet and using the mouse while at home. I'll finish up young Mario in a few weeks. In the mean time I'll be jumping onto Luigi. I created several dozen sketches for him and really liked the design below. (As a side note, all the characters and environments I intend to create for "Mad Mario" were concepted out sometime last year. I'm holding off on posting each one until I work on the model.)

Luigi is a bit of an innocent in comparison to Mario. He was fun to design since his shape and personality is the complete opposite from Mario. I didn't bother to created a full rotation of the character in 2D. I'm comfortable enough to go straight into 3D to work out the other views. I thought I'd give you a glimpse into this process below since it's some what unconventional and a method I don't use too often.

I always start with the head when I don't have all the necessary concept images (front, side, back, etc.) What you're looking at is a few "strips" of polygons that I've used to outline the basic shape of the head. This helps me to work out the proportions as well as set up the edge flow of the geometry. I love this method since I can see the entire character's head in about an hour.

From here I begin to stitch the different landmark areas together (eyes, mouth, ears, nose, and jaw). You can see it's taking on a similar flow to your facial muscles. This is intentional and becomes very important for animation. Setting this topology flow from the start is essential.

Here I begin to focus on the eye shape, socket, and the zygomatic & zygomatic arch. I enlarged the eyes slightly here. Even though the size matched my reference, they looked a little too small and plain. This type of deviation from a reference image is necessary at times. Often 2D drawings don't translate well to 3D or they loose their appeal. When doing personal work like this, I don't hesitate to make big changes like this.
I also added the moustache here. This addition brings out more of his personality. It also brings the face together more for me. From here I'll fill in all the gaps you see left and move on to the hair.
So theres a small look inside how I'm creating Luigi. I've used this method for all the characters in "Mad Mario" thus far.
Sunday, June 10, 2012
Detail Update

I've been reading "The Hobbit" again for the dozenth time. That's melting a little into the character, since Mario is taking on a slight Bilbo appearance. I'm embracing since I feel like young Mario is also somewhat innocent and aloof.
Also something worth of note is the eyes. That's the very first bit of detailing I do to characters, especially with children models. It sets the entire tone of the character. I always recommend working that out from the start.
Young Mario Base Color
Got a little time in tonight on the texture. Mostly "under the hood" UV and ambient occlusion cleanup work. However I made enough progress that my base hues have been chosen. I figured I would try to update a little more often with young Mario so you could see my process in a bit more detail.


The red and brown look of the original Super Mario (NES) was always interesting to me. They switched him over to red and blue clothes later on. Since I'm telling a darker origin story, I want to get back to those warmer colors.
I'll tackle all the texture details at the same time (face, clothes, boots, pants, etc.) however the head is where most of my time will go. Children are very difficult to texture because they have such soft features. My approach this time around will be to concentrate on the pinks and reds where the fatty tissue is. You can already see part of this with the ears. The nose and cheeks are next.
Wednesday, June 6, 2012
Doing The Time Warp
Hey everyone, really quick update. I finished young Mario's model sometime shortly after my last post. Unfortunately the hand-me-down PC that I was donated kicked the bucket and I was without one for a while. However I'm back up and running (with a new PC might I add!).
I'm all setup for texturing the character now. Should be pretty smooth sailing from here. The base texture is all worked out. I just need to play with the colors and detail it up.
The fun part of this is making a character at two stages of his life in 3D. I love trying to make young Mario look like old Mario while still retaining that baby face. I have to say, I'm really looking forward to making Luigi and the rest of Mario's extended family. That's all I'll say for now.
I'm all setup for texturing the character now. Should be pretty smooth sailing from here. The base texture is all worked out. I just need to play with the colors and detail it up.
 |
| Young Mario Compared to Old Mario |
The fun part of this is making a character at two stages of his life in 3D. I love trying to make young Mario look like old Mario while still retaining that baby face. I have to say, I'm really looking forward to making Luigi and the rest of Mario's extended family. That's all I'll say for now.
Tuesday, November 1, 2011
I'm Back...Also Young Mario
I now have a brand new computer that was donated to me by an extremely generous friend. After MONTHS of being without a computer at home, I'm finally back up and running again.


During my down time, I attempted to take a little break from art. Of course, as an artist, I'm unable to completely turn off the brain. I continued to work out ideas in my sketchbooks. I'm happy to report that most of Mad Mario is now completely concepted out; there's very little left to be designed.
I tossed back and forth trying to determine if I would move forward with it in 2D or 3D. I love the raw nature of sketching and have grown found of these characters in their 2D form. I do, however, get very overwhelmed when thinking about how much would actually need to be drawn, inked, and colored.
So I settled on 3D for several reasons.
1.My primary motivation was that once I create a 3D asset, I'll never have to draw it again. I can reuse it as much as I want and never have to worry about perspective or drawing off model.
2. I'll have complete freedom of camera angle. I can essentially "play" with the shot and come to compositional ideas I didn't think about in 2D.
3. Once I start to build enough of a 3D library, I'll be able to start kit bashing (re-using existing pieces as a starting point) and production will be much faster.
I started the long walk forward. I have a pretty good task list scheduled out. Young Mario happens to be the first on my list.
Yes, that's right! YOUNG Mario!


He couldn't possibly have been born mad!
I was actually able to reuse Mad Mario's pants, boots, and hands for young Mario with a little tweaking. I'm only a few hours into this, but I'm making a lot of progress. The head is fairly straight forward, since he's so close to adult Mario. The area around the nostrils is a little tricky. I had to delete a few attempts already. I'll revisit it again after building up the zygomatic bone a little more.
I think it's going to be several months before you see the first finished "panel." In the meantime, I'll try to keep this updated with my progress so you can check it out!
Wednesday, October 13, 2010
Mad Mario Backdrop

I think I'm pretty much finished up on the background matte painting. I toyed around with add more detail and structures to the landscape, but I felt it was distracting from the character. For now, I'll leave this as it is at the moment. I'm going to move on to adjusting some of the chracter lighting in 3D. I should begin rendering the final segments for Mario tomorrow.
I'm looking forward to being finished with the reel. I'm ready to move on to something else....
Saturday, September 25, 2010
Mad Mario: Getting Warmer
I've been playing around with the materials and lighting a little more. I settled on more a an glowy ink feel rather then realistic. I created several subsurface scatter tests and I wasn't pleased with any of the results. It doesn't fit with the overall design aesthetic. SSS feels very obvious, even if it's effects are tuned way down.
So I have a pretty complex shader tree that is utilizing several falloff maps for things like self-illumination, specular levels, specular color, glossiness, among several others. I'm really happy with the outcome so far. I am playing around with the lighting to get the right contrast balance. Ultimately I'll play a lot with the final images in post, but they are getting close.
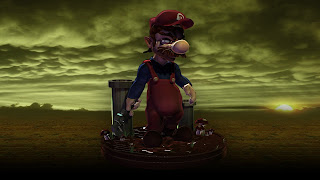
I also created a quick background comp, just to arrive at an understanding of the mood I'm going for. Initially my thoughts were to go with an underground sewer feel, similar to the 2nd level in Super Mario Brothers. The level uses blues and aquas, with lots of piping in the background. After playing a bit, I'm thinking about going for more of a toxic surface feel. I think it would be fun to see what a brick desert would look like from the game. The sickly yellow-green really makes Mario stand out, in a positive way.
I was shying away from this because Togo is using the same sort of color scheme, but I think I can pull off enough differences that it won't look completely similar. I also want to toon the feel up a little, so that Mario's section of the demo reel will be a nice transition into the Secret Agent segment (see older posts).
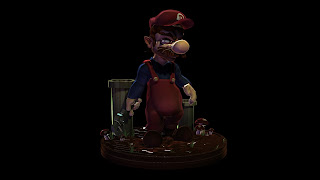
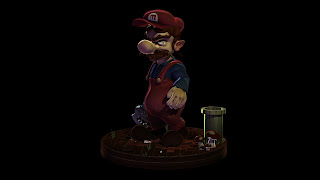
So I have a pretty complex shader tree that is utilizing several falloff maps for things like self-illumination, specular levels, specular color, glossiness, among several others. I'm really happy with the outcome so far. I am playing around with the lighting to get the right contrast balance. Ultimately I'll play a lot with the final images in post, but they are getting close.
I also created a quick background comp, just to arrive at an understanding of the mood I'm going for. Initially my thoughts were to go with an underground sewer feel, similar to the 2nd level in Super Mario Brothers. The level uses blues and aquas, with lots of piping in the background. After playing a bit, I'm thinking about going for more of a toxic surface feel. I think it would be fun to see what a brick desert would look like from the game. The sickly yellow-green really makes Mario stand out, in a positive way.
I was shying away from this because Togo is using the same sort of color scheme, but I think I can pull off enough differences that it won't look completely similar. I also want to toon the feel up a little, so that Mario's section of the demo reel will be a nice transition into the Secret Agent segment (see older posts).


Wednesday, September 22, 2010
Mad Mario: Lighting and Materials
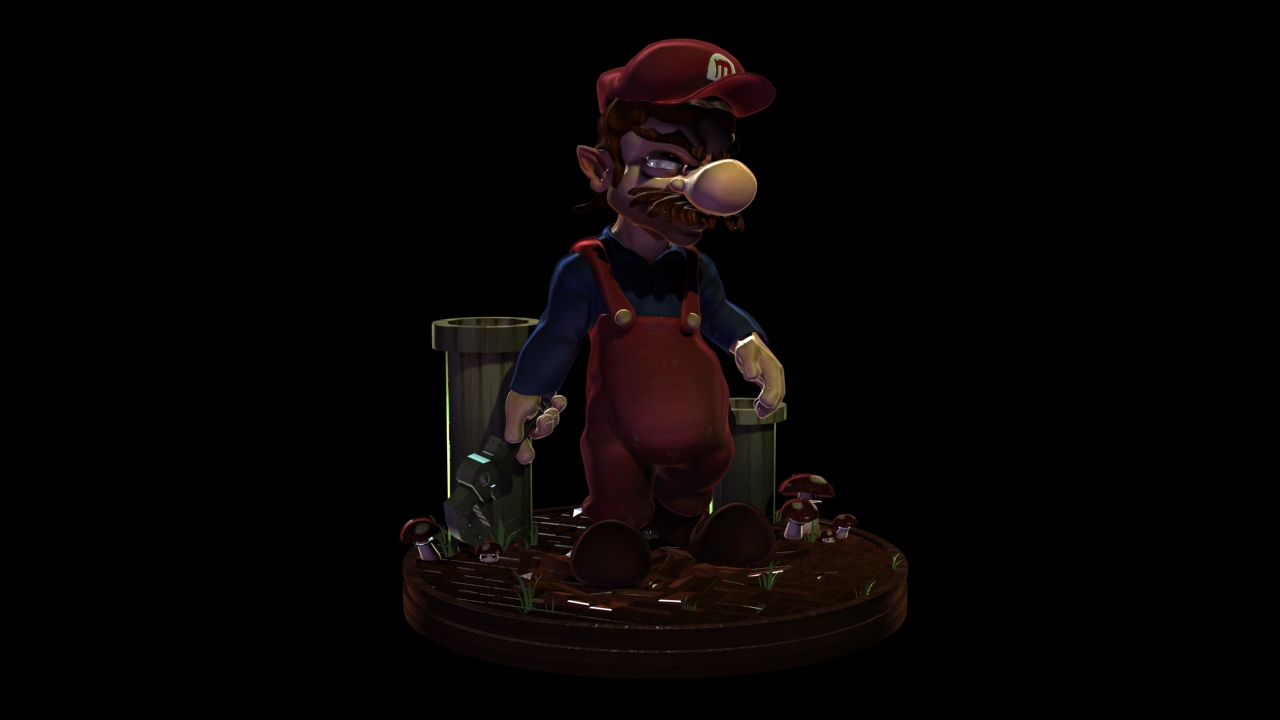
Currently I'm playing around with lighting and material tests. I feel like the material really needs to look like a cartoon without being cartoony. The point of Mad Mario, is that it studies the darker nature of Mario's actions. It's a deep character study.
I want to convey this message completely through visual means for the reel. The lighting and materials reflect this best. Because of this, I have to come up with some creative solutions. At the moment I'm using a custom falloff map as a specular map. This way the character will always very bright rim light on the edges. This makes him pop from the environment a little more then normal.
At the same time I want to create some high contrast with the shadows. Really dark areas of the character that I would normally want to see, such as the face. It creates mood, but also lets the rim light on the edges of the hat and head be the focus.
I'm looking at several pieces of illustration as inspiration right now. Comic books are extremely helpful. Frank Millar's Sin City is particularly helpful when working out contrast.
I still have a long road ahead, but I think it's coming along.


I want to convey this message completely through visual means for the reel. The lighting and materials reflect this best. Because of this, I have to come up with some creative solutions. At the moment I'm using a custom falloff map as a specular map. This way the character will always very bright rim light on the edges. This makes him pop from the environment a little more then normal.
At the same time I want to create some high contrast with the shadows. Really dark areas of the character that I would normally want to see, such as the face. It creates mood, but also lets the rim light on the edges of the hat and head be the focus.
I'm looking at several pieces of illustration as inspiration right now. Comic books are extremely helpful. Frank Millar's Sin City is particularly helpful when working out contrast.
I still have a long road ahead, but I think it's coming along.


Sunday, September 19, 2010
Mad Mario-Turntable
Finally worked in a few hours to work on the base and lighting for Mario this weekend. I'm juggling around a few approaches for the shaders, which ultimately will make everything "pop" more. I'm very interested in working on a backdrop painting for this one.
I initally went very moody with the lighting, but I need to lighten up the scene since this is for a demo reel. Otherwise we won't be able to see the character.


I initally went very moody with the lighting, but I need to lighten up the scene since this is for a demo reel. Otherwise we won't be able to see the character.


Sunday, August 22, 2010
Mad Mario Character Pose
Currently I'm working with posing and building the stand of this character. This is a ton of fun to work on!


Subscribe to:
Posts (Atom)